The Complete South America Packing List: For Vacationing, Backpacking & Hiking
So you’re going on an adventure to South America? Working out exactly what to pack for a short vacation or a longer term backpacking trip can feel like a daunting prospect: after all, what happens if you forget something essential or find yourself completely underprepared for the weather, altitude or climate of South America?
Before my first ever backpacking trip to South America back in 2014, I remember feeling exactly the same way. Since then, I’ve spent over five years living and travelling in the region and have backpacked, vacationed and lived across the continent, writing guidebooks (and this blog!) along the way to help others get to grips with a trip to South America. I’ve travelled on a budget and travelled in style, so I know exactly what to pack for South America depending on the type of trip you’re taking.
I’ve overpacked (mostly), underpacked (rarely) and discovered exactly what items you can and can’t find across the continent if you forget or mislay them during your trip. I’ve also learned which hiking, camping and general backpacking gear can withstand months (if not, in many cases, years) of travelling, so I can talk with educated knowledge about what you should – and shouldn’t – invest your money in.
Pack for a whole host of climates, altitudes and weather systems with this packing list for South America.
Key things to consider before packing for South America:
- What type of travelling will you do? Whether you’re planning a hiking adventure in Patagonia or hitting the beaches in Colombia, your luggage is going to look fairly different. This guide has been designed to cover most bases, and has different sections that you can dip in and out of. You can also read my complete packing guide to Patagonia if you’re planning on spending most of your time hiking.
- Don’t overpack: laundry facilities are inexpensive across South America and located practically everywhere you’ll go. As a result, you can pack fewer items of clothing because you should be able to do laundry every couple of weeks. Turnaround at laundrettes can be as short as 12 hours and it should only cost a few dollars for a full load – making it extremely affordable. The only issue I’ve found is that they do have a tendency to damage your clothes, as well as occasionally losing socks and underwear. Always count the items of clothing you drop off and double-check everything’s there before you leave the shop when you pick it back up again.
- You can buy most things in shops in South America. Big cities tend to have all the shops you’ll need for picking up items of clothing, toiletries and electricals, with large, modern department stores often your best bet. However, prices on imported goods can be higher than you’ll find at home; I’ve found this particularly the case for electrical items and camping equipment (the latter of which is generally poor quality and very expensive).
- Safety can be an issue in South America. The fewer obviously expensive items you can pack (yup, I’m looking at you, the latest iPhone or MacBook), the less likely you are to get robbed, and the more you’ll enjoy your trip! You also want to always keep an eye and a hand on your belongings: this is very important in bus, train and metro stations where you want to have an arm through your rucksack strap or on your suitcase as thieves are very good at stealing them without you realising they’ve gone. Make sure you also never put valuables into any luggage that goes into the hold on a bus or even into the luggage racks above your seat. Instead, keep valuable items at your feet and preferably securely attached to your person. Read our guide for more information about the safest countries to visit in South America.
So what do you need to pack for South America? Here’s my packing list honed over seven years of exploring the continent.
What’s in this article:
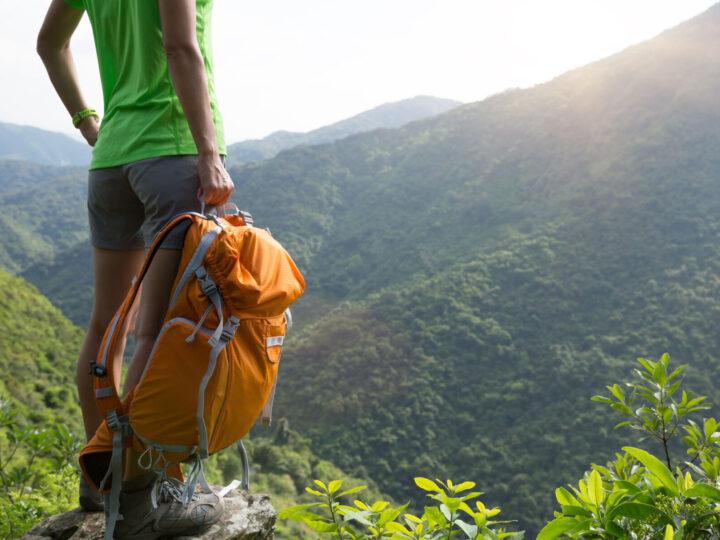
Backpacks for South American travel
The type of luggage you bring is a personal choice, and you do see travellers with wheelie suitcases in South America. However, if you’re planning on doing any multi-day hikes in South America (of which there are plenty), a backpack is the most versatile choice. Pulling a wheeled suitcase over cobbles or poorly-maintained streets in cities and towns across the continent is going to be hard work.
Finding a backpack that’s comfortable for wandering the streets from the bus stop to your accommodation, as well as when you’re on day eight of the O Circuit in Patagonia’s Torres del Paine National Park is no mean feat. I’ve had the same backpack for the past seven years and don’t look forward to the day I have to part from it. Not only is it a women’s fit (a very important choice if, like me, you’re not the tallest), but it has an adjustable back system, which has meant I can adapt it to fit me more comfortable.
However, to be sure it would fit before I bought, I took myself to a local outdoors shop to try on a number of ruc backpacks. This is a great way to make sure you don’t sink loads of money into a bag that will cause you frustration – or worse, a bad back.
A good-quality backpack and rain cover are essentials for exploring the continent – particularly if you plan on doing any multi-day hiking.
You also want a backpack that is as functional as possible. If you’re planning on hiking in South America or even travelling to countries near the Equator where it tends to rain heavily for periods of the day, a rain cover – either included or additional to your pack – is a smart idea, while various pockets, including side pockets for stuffing with shoes or water bottles, give your backpack space to grow and store more things if needed.
Unfortunately, my backpack, the Berghaus Torridon 60 litre, is no longer available to buy. Instead, Osprey is a great brand that’s a little more expensive but known for being exceptionally reliable and long-lasting, making their bags idea for both short and long-term travel.
- For her: With plenty of ways to adjust the fit, plus ventilation for keeping your back cool on sweaty treks through the city or great outdoors, the Osprey Aura AG 65 litre (if you plan on doing longer, multi-day treks: buy it from REI|Osprey|Amazon) or the Osprey Aura AG 50 litre (for general backpacking: buy it from REI|Osprey|Amazon) are sturdy, long-lasting and comfortable backpacks.
- For him: The men’s Osprey Atmos AG 65 litre (buy it from REI|Osprey|Amazon) and Atmos AG 50 litre (buy it from REI|Osprey|Amazon) have similar functionality:
- Add a rain cover from REI|Osprey|Amazon to make sure your pack is 100% waterproof.
Wheeled suitcases for travelling in South America
Don’t fancy lugging your belongings on your back like an oversized turtle? A wheeled suitcase isn’t the most practical luggage for South America, but it’ll work, particularly if any hiking plans you’ve got will involve a daypack instead (more on that below).
When it comes to a wheeled bag, one of the main considerations is whether you go for a hard or soft case. Soft cases have the benefit of not cracking if placed under stain (and on buses in South America they do tend to like throwing the luggage around), but if you’re concerned about security, a hard case has the edge.
- For him and her: Made from recycled materials inside and out, fully carbon neutral and available in three sizes, the Aviator from sustainability-focussed brand Paravel is my favourite hard wheeled suitcase. Go for the Aviator Grand for a checked-luggage size. If you’re in the UK, I swear by TRIPP suitcases.
Daypacks for South America
A day pack can serve multiple purposes on a trip to South America. For days spent exploring the city, a 20- to 30-litre backpack will be the perfect size, with enough room to carry water, a camera and extra layers. It’ll also be the right size for day hikes, whether trekking in Torres del Paine National Park or for a day exploring Machu Picchu. They’re also useful as hand luggage on the plane or when travelling overnight on buses.
Again, I recommend comfort and functionality when it comes to a daypack. An adjustable waist strap is invaluable when you’re hiking, while a waterproof rain cover and smaller pockets for keys or lip balm are also handy.
I spent many happy years with my Lowe Alpine daypack, however it’s a brand that’s practically impossible to find in the US. Instead, Osprey is again a great alternative.
- For her: You can find my Lowe Alpine 25 on Amazon or check out the Osprey Sirrus 24, which is packed with pockets, has a waistband and rain cover and is easy to adjust: REI|Osprey|Amazon
- For him: The Osprey Stratos 24 has similar functionality as the women’s version: REI|Osprey|Amazon.
Clothes for South America | Hiking and essentials
Choosing which clothes to pack for a South America trip is all about versatility – and recognising that this continent is one hell of a huge place with an incredibly wide-ranging array of climates and altitudes.
No, it’s not always hot and sunny in South America and yes, there are places where it feels like it rains all the time (or it actually does if you’re visiting in rainy season). Before you begin, check out my guide to when to visit South America, which runs you through the types of weather you can expect in different parts of the continent. However, it’s worth bearing in mind that you’ll want to be packing for pretty much every possible climate if you’re planning a backpacking adventure that spans more than just one country.
It’s also worth noting that altitude can have a real impact on temperatures. If you’re heading to Cusco, Machu Picchu, Arequipa, Huaraz, Quito, La Paz or other similarly high-altitude destinations, you’ll quickly notice that temperatures drop significantly at night. A warm fleece or down jacket will quickly become your favourite item of clothing.
Pack a Gore-Tex waterproof coat that’ll keep you warm and dry, even on a boat at the very ends of the earth!
Finally, a note on fabrics. Quick-dry and moisture-wicking materials, such as polyester, nylon and linen, are a good choice, particularly if you end up needing to do a wash in a sink in your hotel (you invariably will). Cotton will keep you cool, but takes absolutely forever to dry, while silk will end up getting crumpled in your bag.
If you don’t have much already in your wardrobe that seems good for travelling, REI have a whole range dedicated to travel clothing for men and women that’s worth checking out and that can be filtered according to material and qualities (such as moisture-wicking).
A waterproof jacket: I grew up in a family who takes hiking very seriously and I can’t fault my dad for persuading me that a good quality Gore-Tex waterproof jacket is an essential item of clothing for your bag. It’ll keep you dry and, if you spend more, the material is going to be breathable and stop you getting too hot or sweaty, even if you’re hiking. My latest jacket, the Patagonia Storm10, is a three-layer waterproof (read: extremely dry) made from 100% recycled nylon. It’s very thin, which makes it light but also easy to layer up using a down jacket or cosy fleece beneath.
- For her: I love the Patagonia Storm10 Jacket as it’s an ultralight, easy to pack but fully waterproof jacket (Patagonia)
- For him: the Patagonia Storm10 Jacket is a good option (REI|Backcountry|Patagonia); if you want something that’ll last you a decade, check out pricey but industry-leading Arc’teryx (REI|Backcountry|Amazon)
A warm fleece: Fleece is a material designed to keep you warm by trapping body heat; at the same time, it’s extremely lightweight. It’s not only great for cool evenings when the temperatures drop, but it’ll be a great addition to your hiking backpack if you head out into the mountains.
- For her: Go for this inexpensive one from Columbia or pick up an even cheaper one from REI
- For him:Mountain Hardwear have great options: REI|Backcountry|Amazon
A down jacket: I don’t think I wear any coat more than my down jacket. It’s because it not only provides me with a welcome extra layer, but it also packs down very small and light and can easily be worn under a waterproof jacket if I’m feeling really cold. Be aware that, while a down jacket is a great piece of kit, because down (the feathers used inside the coat for insulation) isn’t designed to get wet, you want one that’s either water resistant (pricey) or synthetic down (cheaper but heavier). I’ve been wearing a Jack Wolfskin down jacket (Amazon), which is packed with responsibly-sourced down with 700-fill (a number that basically puts it at the top of the range when it comes to warmth). It’s also extremely light, so excellent for shoving in your pack for when you need it.
- For her: I love my new Jack Wolfskin down jacket (Amazon). The North Face has some good synthetic down jackets (REI|Backcountry|Amazon), while Mountain Hardwear has some water resistant down jackets (REI|Backcountry|Amazon).
- For him: REI has some good synthetic down jackets and some of the most affordable water resistant down jackets
Two or three x hiking trousers and shorts: Whether you’re looking to hit the trails across South America or might do a bit of day hiking here and there, a couple of comfortable pairs of hiking trousers are must-haves; trust me, you’ll regret any hikes you do in jeans. Hiking trousers will also be extremely comfortable on days spent wandering around the city.
Investing in those that are quick-dry is a must (nothing’s worse than getting rained on and your trousers staying wet). prAna are known for the durability of their women’s hiking trousers, while Columbia have some great options for men.
- For her: Get prAna hiking pants at REI|Backcountry|Amazon.
- For him: Columbia’s Silver Ridge style (REI|Backcountry|Amazon) is a great option.
Two or three x hiking tops: Lightweight, easy drying and quick-to-wash hiking tops are also essential, particularly as they’ll keep you nice and cool in the South American humidity. Any sort of sports tops should suffice, but make sure they’re made from moisture-wicking materials.
- For her:REI have some great own-brand t-shirts
- For him:REI have some own-brand t-shirts for men, too
Hiking poles: They might seem like something you only need once you’ve gotten past a certain age, but hiking poles are now something I always take with me on a hike. Not only are they great for taking the pressure off your knees when you’re going downhill, but they’re extremely handy if you roll your ankle or injure yourself on the trail. Check out REI’s guide to selecting trekking poles or try Black Diamond from REI|Backcountry|Amazon.
Clothes for her
Seven or eight x casual tops: These can be a blend of tank tops, short-sleeved (for protecting your shoulders from the sun) and long-sleeved t-shirts (the latter are good for the jungle when you’ll want all skin out of sight), as well as casual shirts (great for throwing over you in hot weather when you start burning). Sustainable companies such as Organic Basics and Tentree have some great t-shirts and tanks from recycled synthetic materials, organic cotton and linen; just avoid light colours which will end up getting stained
A smart top or shirt: There’s likely going to be at least one occasion where you’ll want to dress up and a smart top or shirt can make you look respectable.
Two or three x comfy linen trousers or similar: I never travel with jeans for the main reasons that they’re a) very bulky and b) horrifically unpleasant in hot, humid climes. Instead, I prefer linen trousers or ones made from a lightweight, quick-drying material, such as recycled polyester. Tentree has some great linen and recycled polyester trousers.
Two or three x pairs of leggings: Leggings are an absolute essential when it comes to your South America packing list. I tend to have three in my backpack: two pairs for hiking and another pair that can be worn either out and about or for sleeping in cold climates. Any pair of leggings will do, but REI has some affordable options, while prAna does some really comfortable pairs (REI|Amazon) which have handy side pockets for your phone or other essentials on the trail.
A comfy pair of leggings is an essential hiking and day-tripping addition to your backpack.
Two or three x pairs of shorts: Depending on when you visit South America, it can get very warm, so a few pairs of lightweight and quick-drying shorts are a must (or just throw in a few more trousers if you don’t like getting your legs out). TenTree have some lovely linen shorts.
One or two dresses or skirts: Sticking with the theme of wanting to look nice and respectable at some point during your trip, a dress or two can make you feel a bit smarter.
A lightweight jumper or cardigan: Even in the hottest, most humid parts of South America, temperatures can drop, so a lightweight jumper or a cardigan will keep you cosy and warm against the chill.
One or two x swimsuit or bikini: There are plenty of opportunities for swimming in most parts of the continent and the water can be extremely inviting on a hot day.
One x pair of pyjamas: I tend to wear short pyjamas at night and put on a pair of leggings if I get cold.
Ten x underwear: This should be enough to go without doing laundry all the time if you’re travelling for a long time.
Five x bra: As above.
10 x socks: This depends on the type of shoe you plan on wearing. If you’re going to be in trainers, bring plenty of trainer socks, plus at least four pairs of hiking socks. I wear a liner pair and an outer pair when I’m hiking, but you might just wear the one pair with your hiking boots. Bridgedale (liner and outer socks) or Darn Tough are good for both liner socks (REI|Darn Tough|Amazon) and outer socks (REI|Darn Tough|Amazon)
One x scarf: A lightweight scarf has been invaluable for me during my time traveling in South America. Not only can it keep you warm, but it can be an excellent light layer against the sun when it gets too hot or be used as a blanket on an overnight bus journey.
Clothes for him
Seven or eight x casual tops: Go for a range of different styles; just make sure they’re lightweight and quick-drying, plus some long-sleeve casual shirts that can be worn over a t-shirt for extra warmth. Organic Basics have some great tencel t-shirts (made from wood pulp that’s lightweight and more moisture-wicking than cotton). Again, avoid light colours that will get stained from sweat or just general wear.
A smart top or shirt: Great for helping you scrub up nicely when required.
Two or three x casual trousers: As suggested above, I would strongly recommend against packing heavy and hot jeans. Instead, go for cargo trousers or any other type of lightweight trouser – again made from a quick-drying material such as recycled polyester or nylon.
Two or three x pairs of shorts: Bring more or less depending on whether you prefer wearing trousers or shorts.
A lightweight jumper: You’ll want something that’s thin but can provide an extra layer of warmth when needed.
One or two x swimming trunks: This allows you to have a pair drying and a pair being worn
One x pair of pyjama bottoms: Even if you generally sleep naked, think about those around in your hostel or hotel – you’ll want a pair of pj bottoms if you do share a bathroom and need to exit your room in the middle of the night!
Ten x underwear: This should be enough to go without doing laundry all the time if you’re travelling for a while!
10 x socks: This depends on the type of shoe you plan on wearing. If you’re going to be in trainers, bring plenty of trainer socks, plus at least four pairs of hiking socks. I wear a liner pair and an outer pair, but you might just wear the one pair with your hiking boots. Bridgedale (liner and outer socks) or Darn Tough for both liner socks (REI|Darn Tough|Amazon) and outer socks (REI|Darn Tough|Amazon)
Footwear for your South America trip
A pair of hiking boots: I’ll always be an advocate for hiking boots and I’ve bought Salomons for my last three pairs. Mostly, it’s because they don’t give me blisters (an issue I’ve faced in the past), and because they’re made of Gore-Tex so keep my feet completely dry on hikes. They’re also a lot lighter and have better breathability than those made from leather.
However, if you’re not planning on doing much hiking – and only expecting to wander around towns or embark on day hikes – it might be better to just take a pair of decent hiking shoes instead.
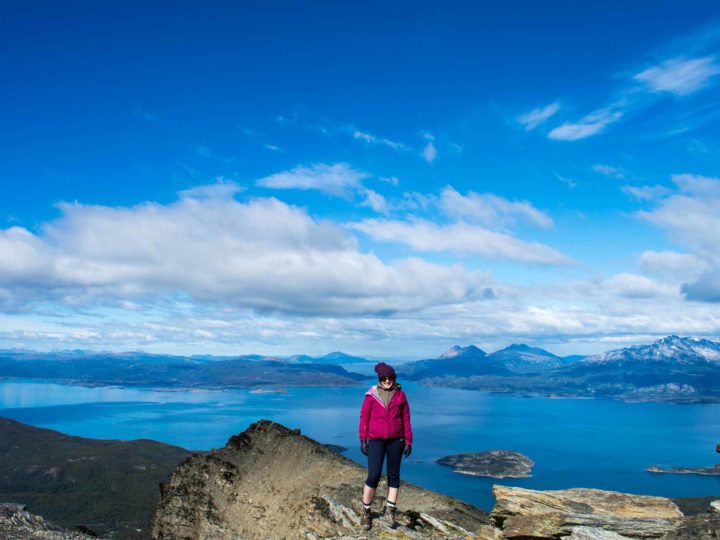
Overlooking the Beagle Channel after a long hike – and sporting my first ever pair of Solomon hiking boots.
It’s worth going into a shop to try on boots before you buy them online to make sure you know your size; trust me, nothing’s worse than a pair of ill-fitting hiking boots. Try them on with the socks you’ll be wearing with them and you should get a good sense of whether they fit or not. It’s also important to break new boots in (i.e. wear them for a few short walks beforehand) before taking them with you to South America.
Salomon has been my go-to hiking boot for a long time:
They also do hiking shoes:
A pair of sandals or flip flops: When you’re spending a day sightseeing or at the beach, you want something comfortable that’ll keep your feet cool and allow them to breathe. I travel with a sturdy pair of Teva sandals, as well as some flip flops (made from sustainable materials) for lounging.
My Teva sandals are sooo versatile and I know they’re going to last forever.
A pair of trainers: If it’s colder or you just want something comfy on your feet that isn’t as heavy-going as a pair of hiking boots, trainers are ideal. Make sure they fit well and don’t rub.
Travel essentials for South America
Travel water filter: A water filter is an environmentally-sound investment for your trip and one that should save you money in the long-run by cutting out spending on bottled water. I’ve used so many different types of water filters cross the years but my favourite has long been the Steripen Adventurer, which is the quickest and easiest method of filtering water that I’ve found: you simply insert the Steripen into a 0.5- or one-litre container of water and stir it for the required time. Hey presto: clean water. The batteries should last up to 50 litres, although they are an unusual type of battery, so purchase a spare set before you leave. Another alternative is the Grayl Geopress, which performed very well when I tested out half a dozen water filters for travel.
A water bottle: To use the Steripen, you need a water bottle with an opening of at least 38mm (I have a Nalgene bottle).
A dry bag: One thing I quickly learned travelling in South America is that when it rains, it pours. And when it rains – and you don’t have confidence that your backpack is waterproof enough – or perhaps you’re on a river boat in the Andes and want somewhere to store your camera and passport in case you take an unexpected dip, you’ll want a dry bag. Seriously, these have saved me so much money in damaged valuables that they’re completely worth the investment. I love Sea to Summit dry bags because of their quality and durability: REI|Backcountry|Amazon
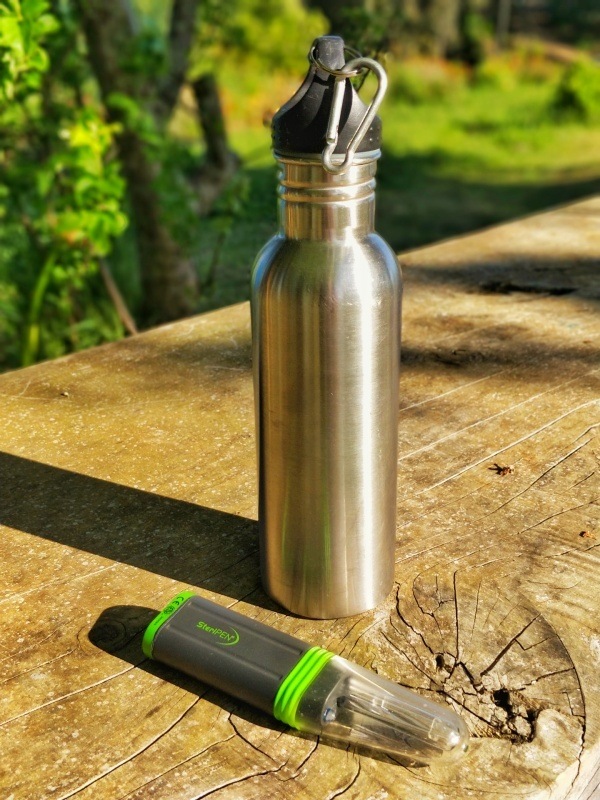
The Steripen Adventurer has been my go-to water purifier for years.
A compression bag: A bit like packing cubes, compression bags help you stuff and compress clothing so you can fit more into your bag. Just remember to roll rather than fold otherwise you’ll end up with some really creased clothing. Get one from REI|Backcountry|Amazon
Emergency cash: It’s always worth having some spare cash on you in case your wallet gets stolen. I tend to keep around $100 USD in different pockets across my backpacks in case of emergencies.
Travel documents: Keep a photocopy of your passport, travel insurance and travel vaccinations (including yellow fever card) on your person, in case of emergency, as well as a digital copy somewhere safe (and preferably shared with someone back at home).
Travel insurance: I never travel without travel insurance and it’s the number one way you can prepare for your trip to South America.
Bank cards: Withdrawing money from ATMs is fairly straightforward in South America, although you can face a lot of bank charges if you don’t have an account that gives you free cash withdrawals abroad. I would highly recommend finding a company that allows you to do this. As I’m from the UK, I use a mixture of the Halifax Clarity credit card, which allows unlimited free cash withdrawals per month, as well as my trusty Monzo card (free withdrawals up to a maximum of £200 every 30 days).
Sewing kit: Being able to stitch up a tear in your favourite pair of trousers or even your backpack (something I’ve had to do on more than one occasion) is vital if you’re travelling for an extended period of time. Try this one.
Silk sleeping liner: Unless you’re planning on doing lots of hiking and camping, I would recommend leaving your sleeping bag at home and instead using a sleeping bag liner. You can hire sleeping bags from tour companies across South America, and when you do, you can protect yourself from whatever might be on them with this liner. I’ve also used mine religiously as an extra layer on overnight buses. I use this one.
Sleeping mask: If you need it to be dark when you sleep, a sleeping mask is a travel necessity, particularly as hotels and hostels can have curtains of varying quality. I love this one.
Microfibre travel towel: You want something lightweight that dries quickly, without feeling like it’s just moving the water around. I love my microfibre travel towel (you can also find them cheaper on REI).
Ear plugs: I personally can’t stand them, but if you need silence to sleep then investing in a reusable pair of ear plugs will ensure you get those Zs. Try these ones.
Travel pillow: Long overnight bus journeys can get tiresome and leave you with a crick in the neck if you don’t have anything to rest your head on. This pillow (REI|Amazon) from Sea to Summit is made from a silky, brushed polyester outer that’s soft to the touch and packs down extremely small.
Swiss Army penknife: Invaluable for making sandwiches on the road and handy if your accommodation doesn’t have a wine bottle opener! Check them out on REI|Amazon
Padlock: Many hostels and other accommodations have lockers and you’ll need your own sturdy padlock for using them. Check them out on Amazon
Safety: I’ve never used a money belt, mostly because they’ve always looked uncomfortable and hot to wear. Instead, I tend to have a small zippered bag with various internal pockets where I store my valuables and ensure I always keep my eye on it when I’m out and about. That said, I have heard of people having the straps of their bags chopped without them noticing, so this isn’t exactly a fool proof plan. If a money belt would make you feel better, try this one.
Door stopper: It might seem like the strangest thing to be included on this packing list for South America, but I always travel with a door stop. I’ve stayed in some hotels and hostels where I struggled to lock my room door; as a solo female traveller, this is far from ideal. A plastic door stopper can be used on the internal side of the door to prevent it from being opened from outside, given you peace of mind at night time. Try this one.
Toiletries for South America
Hanging toiletry bag: Easy to hang on the back of a bathroom door or suspend from a hook in your bedroom, a hanging toiletry bag is extremely functional and has been part of my backpack ever since I first started travelling to South America. This one from Sea to Summit has lasted me over seven years and counting.
Sunglasses: The sun’s strong in South America. Invest in polarising sunglasses with a UV filter to protect your eyes.
Sunscreen: It’s not only the beach where you can burn; altitude can see you burn even faster. Opt for a mineral-based sunscreen that’s safe to use in the ocean such as All Good Mineral.
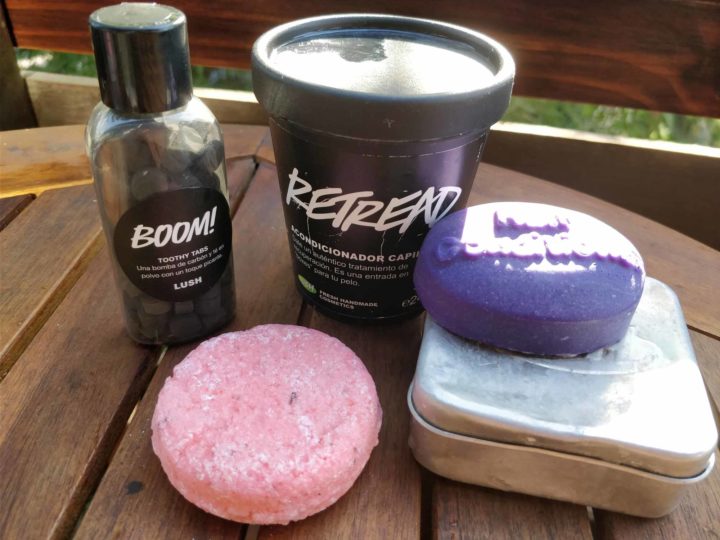
Solid shampoo and conditioner: For weight-saving purposes, buy solid shampoo and conditioner bars, which should get you through a number of months without needing to buy any more. Ethique is a brand with lots of options for solid shampoo and conditioner, while Etsy has lots of brands selling them too.
Hard shampoo and conditioner will lightened your backpack and last you months.
A lightweight, travel medical kit: For any cuts or more serious injuries, you’ll want a first aid kit on hand. Check them out on REI|Amazon or just put one together yourself.
Compeed plasters: Blisters are not something to take lightly as they can make hiking extremely uncomfortable. Pack some Compeed plasters before you go and use them preventatively if you know your shoes give you blisters or after a blister has formed to help it heal.
Face masks: These remain obligatory in shops, public transport and other enclosed public spaces in most countries across South America.
Hand sanitiser: Keep a bottle on hand to use when there aren’t hand washing facilities available.
Malaria tablets: Check with your doctor as to whether antimalarials are required for your trip. If you’re heading into the Amazon, it’s likely you’ll need them.
Motion sickness tablets: Bus journeys into the Andes mountains can leave even the most robust travellers feeling a bit sick to the stomach. Motion sickness tablets can make you feel better.
Anti diarrhea pills: It’s very likely you’ll end up facing a bad stomach at some point during your trip because of poor food preparation hygiene and water that isn’t safe to drink. While avoiding salad (because it may have been washed in contaminated water) and ice in restaurants is a good ploy, you’ll want some anti diarrhea pills for when the inevitable happens.
Vaccinations: Jabs such as yellow fever, hepatitis A and B, typhoid and rabies (the latter if you plan on heading to remote areas) are necessary for travel to South America. Consult your doctor a few months in advance of your trip, as some of these vaccinations require more than one dose.
Insect repellent: The mosquitos in South America enjoy sampling new blood, so make sure you’ve got a strong insect repellent that you can use in hot, tropical destinations. I avoid DEET-based repellent, which can damage you clothing and even melt plastic. This one from Sawyer (REI|Amazon) doesn’t have DEET but still works.
Menstrual cup: I’ve used mine for the past four years and it’s incredible the amount of money – and plastic waste – that it has saved. Tampons can also be difficult to find in South America (or at least the big brands that you’re probably accustomed to at home). Bring a couple of emergency tampons for treks or situations where you don’t have access to running water for cleaning your menstrual cup. Try out this menstrual cup.
Hair brush: These can be surprisingly heavy, so buy a small one that isn’t.
Baby wipes: Great for multi-day treks where showers aren’t a possibility. Do the environment a favour and buy some biodegradable ones.
Face wash: Nivea products are easy to find across South America; other brands not so much, so bring what you need.
Moisturiser: As above.
Make up: Foundation and concealer can be difficult to find for pale skin; otherwise you can buy all the major brands in cities across the continent.
Technology for South America
Unlocked phone: It’s very easy to get a sim card wherever you go in South America and I would strongly recommend you buy one in each country (they don’t work cross-borders) as it’ll help you get access to Google Maps, Whatsapp, this blog etc. whenever you need it. Make sure your mobile phone is unlocked and you shouldn’t have any problems using a local sim.
Camera: I travel with my Sony A7iii, a mid-level DSLR, with a great, all-around travel lens, the 24mm to 105mm Sony lens. However, unless you’re very keen on photography, sticking to a classic point-and-shoot camera is likely a better option, particularly as they draw less interest when you’re out and about and weigh considerably less. My dad swears by his Canon Powershot. Not not only is the image quality incredible but it’s compact and very easy to use. They are often very good deals on buying this camera, particularly when Canon have just brought out a newer version.
SD cards: Make sure you’ve got plenty of space for capturing photographs by bringing a couple of spare SD cards.
Kindle: It can be difficult to find English-language books across South America. While there are always random books for exchange at hostels across the continent, if you want a bit more control over what you read (or want to buy a guidebook, such as my Moon Chile, before you go), investing in a Kindle Paperwhite is a great idea. Remember to charge your Kindle regularly and bring a head torch because it doesn’t have backlighting.
Power bank: Ensure your phone always has charge, even after a long bus journey or a few days away from civilization in the jungle. Anker is a great brand for reliable and inexpensive power banks (Amazon), while REI has a power bank that can be hooked up with solar panels if you’re planning on going far off-grid.
Rapid charging USB cable for your phone: Nothing beats having a slow charging USB cable. I recently bought this one without realising quite how long it was. It would up as a fortunate mistake as it’s perfect for a hotel or hostel where the plug socket is in an awkward place!
Universal adaptor plug: Plug sockets vary a huge amount across South America. To avoid bringing the wrong adapter, it’s best to just use a universal adaptor so that you’ll never be left without access to electricity. Check them out on Amazon
Headphones: A pair or Bluetooth headphones can help you listen to music on bus journeys without needing to have your phone within reach of anyone else. I use these ones, but you might prefer less obvious in-ear headphones instead.
Laptop: Realistically, I would advise that you don’t bring a laptop unless you’re working on the road. I’ve found that the more valuables I take, the more stressful travelling becomes because of the fear of potentially getting robbed. It also adds to the weight of your pack.
Headlamp: Great for reading in bed or for any camping trips you do. Bring a torch or check out Black Diamond headlamps (REI|Backcountry|Black Diamond)
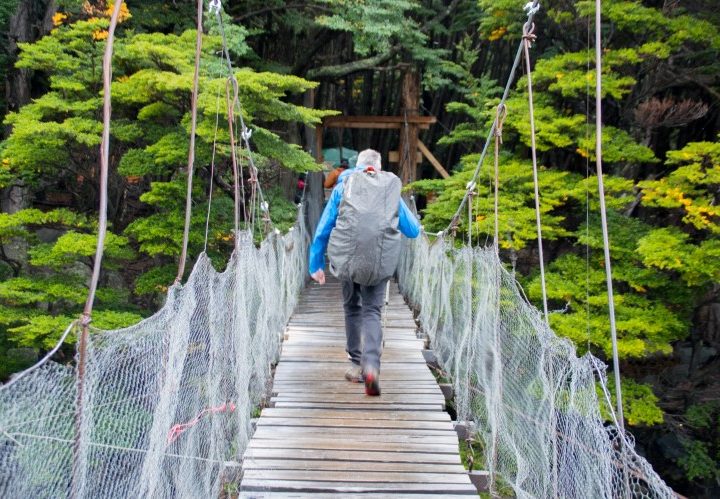
Camping equipment for South America
I often get emails from readers asking whether they should bring their own camping equipment or buy (or rent) gear when they get to South America. The answer I always give is: it depends.
If you’re planning a camping-heavy trip to Patagonia and expect to spend a decent part of your trip staying in a tent – whether on multi-day hikes or to save money on accommodation – then it’s definitely worthwhile bringing your own equipment. Not only can it be expensive to rent for extended periods of time, but you’re hiring gear that has probably seen more than its fair share of wear and tear and might not be in the best condition (or the most waterproof).
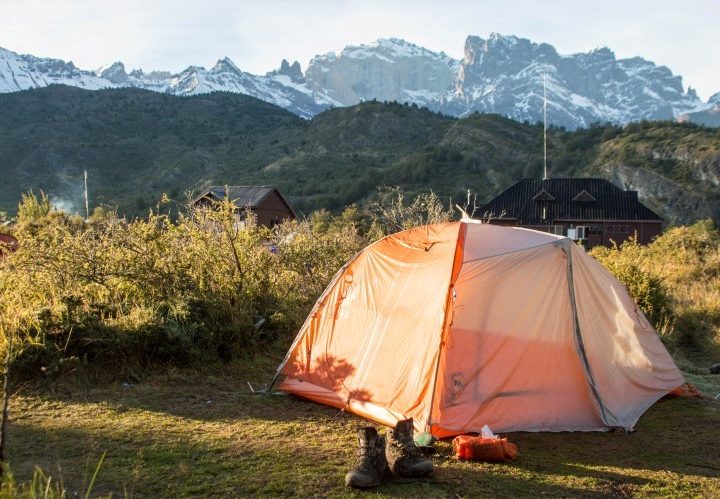
The Big Agnes Copper Spur backpacking tent is lightweight and is perfect for hiking in South America.
Buying camping equipment in South America is also something I don’t recommend. Gear is often significantly more expensive than what you’d find back at home, and, while there are affordable local brands, the quality, however, is generally pretty terrible.
If you’re planning a trip of two halves, with a stint camping and hiking and another leg without, you can always post your camping gear home, sell it to other travellers (something possible using Facebook groups or asking around at your hotel or hostel) or donate it.
Tent: Tents range from the affordable to the extremely expensive and everything in between. If you’re planning on doing multi-day hikes, I would strongly recommend investing in a lightweight tent; your back will very much thank you if you do.
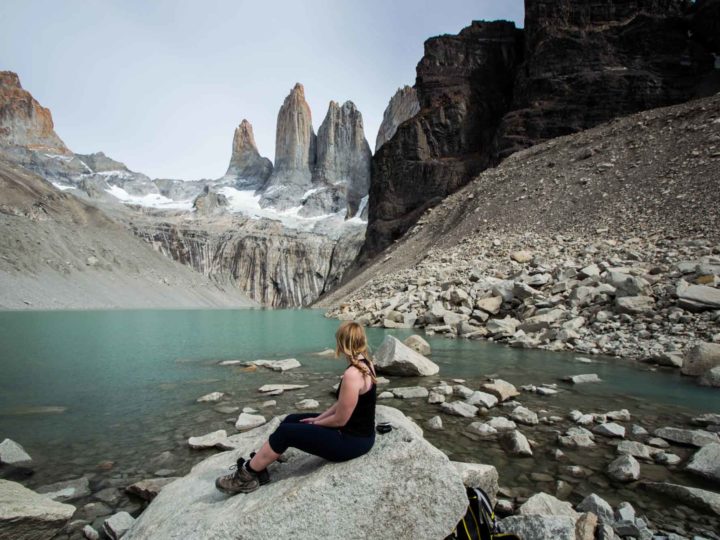
When I hiked the Circuit in Torres del Paine National Park, I took the Big Agnes Copper Spur HV UL2 (and you can read my full review of the Big Agnes Copper Spur HV UL for more information). It is an expensive tent, but I was thoroughly impressed with how light and sturdy it was. More affordable options from North Face are also recommended.
- Try the Big Agnes HV UL2 (REI|Amazon) or the North Face Stormbreak 2 (REI|Backcountry|Amazon) or the roomier North Face Stormbreak 3 (REI|Amazon)
Sleeping bag: Warm and lightweight sleeping bags do come at a premium, however it’s another area where I think it’s worth investing. Nights can get cold on the Inca Trail, in Patagonia or any other Andes region. I recommend a good three or four-season sleeping bag if you’ll be camping at altitude or in Patagonia.
- For her: the Marmot Trestles Mummy 30 (REI|Amazon)
- For him: the cheaper Marmot Eco Elite 30 (REI|Backcountry) or Sierra Designs Cloud 800 (Amazon).
Sleeping pad: Small, comfortable and durable sleeping pads are really hard to find, but will ensure you can get some sleep when you’re camping. You can get a basic, thin foam one for very cheaply. Alternatively, a bigger investment is in an inflatable pad – that gets you off the ground a little, keeping you warmer and more comfortable during the night.
- Get a cheap foam pad (REI|Backcountry|Amazon) or a more comfortable Therm-a-rest Prolite (buy it on REI|Backcountry|Amazon).
Cooking utensils: When it comes to pots and pans, ultimately what you want is something lightweight, versatile and that can be cleaned easily. You’ll also want a bowl, durable, plastic or metal mug and a titanium spork (much sturdier than plastic).
- A set of lightweight pots and pans: Check out the MSR cooking potsBackcountry|Amazon
- Collapsible bowl: Check out Sea to Summit bowlsREI|Backcountry|Amazon
- Camping mug: Check them out on REI|Backcountry|Amazon
- Spork: Check them out on REI|Backcountry|Amazon
The MSR PocketRocket2 is a great camping stove for South America.
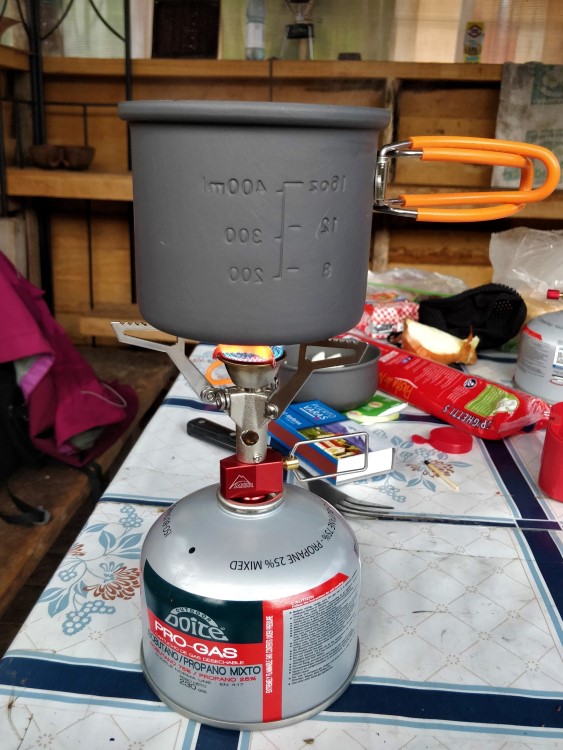
Cooking stove: You want something lightweight and reliable. I used the MSR Dragonfly when I was camping and backpacking around Peru and on the O Circuit hike around Torres del Paine National Park in Chilean Patagonia. Tiny and lightweight, it also uses unleaded petrol – a fuel that can be purchased very easily and cheaply all over South America and which saves you the hassle of trying to find gas canisters.
Alternatively, a more affordable option is the MSR PocketRocket 2, which is smaller, but does need you to buy gas canisters (which you should be able to find in towns and cities near hiking destinations).
What To Pack for South America
Collectively, we have travelled three times in South America in the last 10 years, with a total trip time of 20 months.
During this, we have been fortunate to slowly explore a lot of what the continent has to offer – from the beaches of northern Colombia, down to the glaciers of Patagonia, and so many hikes, cities, and cultural moments in between.
In short, we bloody love travelling in South America – and already have dreams of going back for a fourth time.
We’ve made this South America packing list for the travellers who are going to be spending a few weeks to a few months, or even a year, on their own adventure. It’s primarily aimed at backpackers (the absolute best way to experience much of the highlights and fabric of South America), but it will also give anyone visiting the continent for a shorter period or in a bit more of a luxurious way important tips and ideas on necessary items for the best and most sustainable travel experience.
This packing list is fully based on our own experiences and travels, and the items we have personally purchased and used on our travels in South America. It’s important to note that, over the years, we’ve definitely made many a mistake in our packing (from Emily insisting we needed intravenous fluid packs to carrying nearly 50 kg across way too many bags on our two year Latin America trip from 2014-2016). The existence and affordability of several sustainable travel products – and an increasing appreciation by us and others of our responsibilities as travellers – has also changed the items which we view as essential for every curious traveller.
This list talks about some of those overpacking mistakes, but is more aimed at sharing the lessons and improvements we made so that you can avoid them. As we have travelled in South America a few times, we’re also able to give you clear, honest answers about common first-time packing concerns like whether you really need a sleeping bag or mozzie net, how to keep your valuables secure, and what toiletries you really can just leave at home.
Here’s our definitive South America packing list for backpackers and travellers.
A short note on affiliates | This post contains affiliate links, which means we make a small commission on products purchased directly via our website. This is what keeps Along Dusty Roads alive, so we’d sincerely appreciate you to use these links if you purchase anything on our South America packing list from Amazon. However, for backpacks and hiking shoes, we highly recommend that you don’t purchase them online, and instead try them on in person to ensure fit and support your local outdoors gear shop by purchasing there.
The South America Adventure Profile
Although the 12 countries which make up South America all have different stories, different demographics, different climates, and different issues, for travellers there are actually a lot of clear consistencies and commonalities to every trip itinerary.
This makes packing a lot easier.
So, let’s say you’re going to Colombia, Ecuador, and Peru, for two months (excellent idea by the way!). That is almost certainly going to involve a lot of beach time, a lot of hiking, and spending a few days in capital cities and backpacker towns. If you are instead covering Argentina, Paraguay, Uruguay, and Brazil – or just going to Chile in summer season – that is going to likely involve the same range of activities, location types, climates, and conditions as the Colombia to Peru trip.
The moments, the microclimates and the views may differ greatly between the Inca Trail, Salt Flats, Amazon, Patagonia, Galapagos, a night out in Rio de Janeiro, but you’ll need to carry much of the same stuff in your backpack whether you’re visiting some of them or all of them.
What you specifically bring will of course also be dependent upon whether your itinerary has a specific flavour or curation to it. For example, if you are spending three weeks mostly hiking in Peru or Patagonia, then you’ll clearly have to bring more hiking stuff than someone who is focussed on learning Spanish and surfing along the coast of Ecuador for a month.
Based on this profile, we’ve structured our South America packing list thematically. It includes advice of on clothing or equipment you will need for the majority activities and conditions in the region, alongside the general toiletries, tech, medication, and safety-support items which we think all travellers should bring with them regardless of differences in budget, travel style, and trip length.
Underpinning it is the philosophy that you need to focus on packing several essential items, several specialist clothing items, and the rest of your clothing and footwear needs to be practical and versatile.
Your South America Backpack
Suitcases just ain’t the jam for South America; the backpack is king, queen, and emperor.
Your trusty companion on the road needs to fit you, as well as fitting everything you’ll need. If you don’t already have a tried-and-tested backpack, we highly recommend visiting your local outdoors specialist shop to check out their range and get fitted for your backpack (this is a free service). As there are female specific fits and sizes, ones for long backs and ones for short backs, it simply isn’t worth a lifetime of backpack pain (ask Emily) from lugging around something which just isn’t the right fit for you.
In terms of backpack size (which is measured in litres), for shorter trips of a few weeks to a couple of months a 45-60 litre pack would definitely be sufficient. If you are travelling for longer and not a minimalist backpacker or someone who likes to smell, then we’d recommend going for a larger backpack in the 65-85 litre range (although 85 litres will be far too large and heavy for some people – remember you are the person who has to carry it!)
What We Travel With
Andrew has had the same 80 litre (65:15) Lowe Alpine backpack for 14 years. The thing is bloody indestructible, but the model is unfortunately no longer available on the market. Andrew’s total packed backpack weight for our most recent four month trip was 20 kg.
He recently purchased this lightweight Osprey Talon 44 Men’s Hiking Backpack for shorter backpacking trips – it would be a really good shout for 2 weeks or 2 months in South America.
For the four month South America trip, Emily used her Lowe Alpine Manslu 55:65 Rucksack – it was the perfect size, and she actually had a little room to spare. However, all her kit would have struggled to fit in a smaller bag. Total packed weight was 18 kg.
However, she has also recently purchased this woman’s Lowe Alpine Altus ND 40:45 litre for our shorter backpacking trips and multiday hiking treks. It has incredibly good back support – much better than other bags offering the same litres – as well as a u-shaped front opening. It’s ideal for 2-6 week trips or even longer (providing you don’t have to carry a lot of hiking gear).
The numbers for these rucksacks, e.g. 50:60, means the main compartment of the backpack is 50 litres but its storage volume increases to 60 litres due to an extendable lid or front /side pocket storage.
Both Osprey and Lowe Alpine backpacks come with a lifetime guarantee, with an emphasis on repair rather than replace.
South America Travel Tip | If you’re going on a multiday tour or trek, it’s good to know that most hostels in South America offer a luggage storage service. This means you can leave your big backpack behind and only take the essentials in your daypack. However, we recommend that you do not leave any valuables in the big backpack you’re leaving behind- take them with you or stay at a hostel which also provides individual lockers for your valuables.
Your South America DayPack
Your daypack should never ever leave your side in South America unless it’s safely locked up in a hostel locker.
It’s going to be out in the city with you, packed for day hikes and multi-day trips to the jungle, on your lap on overnight buses, carried in your front when you’re moving between places with your big backpacker, and the holder of all your very most important things.
The size and type of daypack you bring to South America really depends upon what sort of trip you’re planning. As photographers and bloggers, we carry WAY more technology than is acceptable, and so 80% of the space across both our daypacks is actually taken up by cameras, lenses, cables, laptops, and a whole lot of other camera nonsense. Seriously.
If you’re not carrying such ridiculous amounts, you just need something to hold a tablet or laptop, water bottle, paperwork, some cards + cash, a notebook, an extra layer or two, snacks and maybe a camera. A daypack in the 20-25 litre will be perfect for most, but if you have zero plans to use it as your main bag for multiday hikes in South America, you could even go down to the 15 litre range.
What We Travel With
Andrew carries the 32 litre Millican Marsden the Camera Pack. It has lots of features we like and Millican are a great little British company doing things right, but this is primarily a travel bag for photographers or those carrying a lot of tech.
Due to this, it’s a much bigger daypack than most people would require for a trip in South America.
Emily used to use the Millican 25 litre Fraser, but it’s unfortunately it causes back issues for both of us. In this summer’s travels in Europe, she switched to a lovely Fjallraven Kanken 16 litre which is more comfortable but wouldn’t really be suitable for overnights, challenging hikes, or if you have to carry a lot in your daypack generally. For the next backpacking trip, she’ll be on the lookout for something better.
We also carry a packable daypack, which is stored in Andrew’s bag and is incredibly handy. Three women in our Inca Trail group actually used this type of bag as their main daypack in South America and over the four days of trekking!
Day Pack Alternative Options
Osprey Talon 22 litre | Excellent for hikes | View here
Pacsafe 22 litre | Anti-theft and anti-slash daypack |View here
Lowe Alpine Aeon 27 litre| Larger and good for hikes | View here
South America Travel Tip | Never ever ever leave your daypack unattended in a hostel, and never ever ever leave it under your bus seat, under the bus seat in front of you, or in the storage space above you. This may sound like the rantings and ravings of two paranoid travellers, but it’s actually the realistic advice of two people experienced in South America. In a few countries in particular, covert bag slashing and theft on public transport is a significant issue for travellers – the best way to counter it is keep your bag with you. And although hostels are full of lots of lovely interesting new people, they’re also a place where people are waaaay too trusting about leaving their valuables out and about.
South America Clothes | The Essentials
Versatility is key.
There are a few special bits of clothing that you’ll need to bring to South America, but by and large you’ll be wearing and rotating the same shorts, t-shirts, and vests for much of your trip and across most of your experiences.
Remember though, it is NOT always warm and sunny in South America. Despite how the movies and TV series may regularly depict it, there are microclimates within microclimates and such climate diversity across the continent, and anybody going on a trip longer than a month or two is almost guaranteed to go from one place where it’s dry season to another where it’s wet season (or at least feels and acts like it).
Also, many of the the most popular cities to visit (i.e. Cusco) are at high altitude. This means that, regardless of season, it gets pretty chilly at night and you will be incredibly thankful to have packed that lightweight fleece or jumper and a thick pair of socks.
Lastly, it’s a personal bug bear of ours that some travellers to South America exclusively dress like they’re in the Amazon, on a hike, or that they’re at the beach. This is regardless of whether they’re actually exploring a cool city like Medellin, the ephemeral beauty of Buenos Aires, or a colonial masterpiece just as Salvador da Bahia. Just pack some relatively nice or stylish clothes that you’d, you know, wear at home if you were going out in a city!! Of course, nobody should backpack based an Instagram-driven aesthetic, but it really is nice to feel and look nice sometimes when you’re on the road and doesn’t make you any less of a traveller.
This is what each person should pack for their South America basics.
EVERYONE
one x lightweight mid-zip fleece | An absolute essential for South America, whether you’re travelling in dry or rainy season. We bought a couple which would be suitable for all our hikes and any chillier evenings in high-altitude cities (spoiler: there’s a whole bunch of these), but wouldn’t take up too much room or weigh too much. Emily’s Berghaus fleece did the job and is a very affordable option, whilst Andrew spent a bit more on this North Face fleece as he’d gone through cheaper ones too quickly before.
one x hoody or cosy jumper | For bus days, hostel days, adding an extra layer days. The lightweight fleece could easily replace this option, but we liked to have something a bit more snuggly and which didn’t make us look like we were just about to go on a hike.
one x waterproof outdoors jacket | Note that this needs to be waterproof, not just a cool-looking water resistant one like this (basically useless after a few minutes of heavy rain, as we discovered in the Dolomites). Unfortunately proper waterproof, windproof, lightweight jackets cost quite a bit (£75-£200 depending on brand), but should last for a good few years of travel. We both have the same jacket by North Face. If you are travelling in dry season or not really doing a lot of outdoors, then this packable poncho is a good, affordable alternative.
a hat or cap | Or just buy one up out there.
For Her
seven x pairs of underwear | Honestly, you can never have enough pants!
seven x bras | Technically, four lace bra-lets as they weigh nothing, and one proper bra, plus two lightweight sports bras.
five x pairs of socks | This doesn’t include the hiking socks, which we’ll discuss later. Make these a mix of trainer socks and longer ones to cover all eventualities.
one x pair of skinny jeans | Ladies know how versatile these are. The darker the denim, the longer you can get away without washing them! You could also consider bringing another pair of lightweight cotton trousers, but they’re not essential.
four or five x vest tops | Mostly in basic colours, with perhaps a bright one thrown in. These will be perfect for layering, for chucking on with shorts, a skirt or a pair of dungarees. We’ve also discovered that if you can afford to, invest in better quality ones as the cheap and easy H&M style offerings tend to get bent out of shape by launderettes here and generally don’t make it the distance of the trip.
three or four x t-shirts |Preferably not white as they just get so minging (although Emily does not follow her own advice).
two x long sleeved cotton t-shirts | Perfect for those chilly days – either in the city or up a mountain.
one x long sleeved shirt | Either flannel or denim. Flannel is excellent for hikes, but we’ve found it to be a really versatile piece of clothing both for cooler evenings on the coast as well as extra layers when at altitude. Also, because we are both short-arses, we’re able to mix and match these with each other, doubling our options.
five x dresses / jumpsuits | This is the section that may well have true-backpacker girls scoffing, but after many years of just chucking whatever partially clean item of clothing is in her bag, Emily now likes to look a little pretty sometimes when we travel – decent linen or cotton dresses and jumpsuits seem to do the trick.
one x pair of denim short dungarees | Bet you’ve never seen these on a packing list before?! But seriously, they’re the most versatile item of clothing any travel girl can own. Emily has hiked in hers, roamed cities and chucked them over a bikini to head down to the beach. Indi-bloody-spensible.
two x pairs of denim shorts | Preferably lightweight, plus one pair of hard wearing shorts that can be hiked in (or worn in a city, at a push) and some quick-drying sports shorts. Depending how much beach time you plan on having, you may want an extra pair.
two or three x bikinis or swimsuits | If you’re a big boobed lady, don’t assume that you’ll be able to buy swimwear when you’re out there – it’s verrry difficult to get anything good quality unless you track down a fancy department store..
one x light scarf | Culturally, there are no real taboo items in South America. Dressing appropriately and respectfully is of course important, particularly in indigenous or rural areas, but women do not need to be concerned about covering up hair or not showing ankle or anything silly like that. That said, scarves are useful for an extra layer or warmth on a sunrise hike, something to wrap around your head if it gets too hot, to use as a blanket on the bus, or a makeshift sarong on the beach. There’s actually a travel security scarf for women, which includes an hidden zip pocket for cash, cards, keys, or a phone!
one x pair of ‘slouchy pants’ | Essential for those times when you need to just veg out in the hostel, ideal for travel days and double as pyjama bottoms when at altitude.
one x set of pyjamas |lightweight and ones you’re happy to wear in a mixed dorm.
a widebrimmed hat | Emily travels with one – and it ain’t just for the ‘gram!
read next | Beauty, Bras and Backing: Being a Girl on a Budget is Emily’s article about the difficulty of being on the road long-term in the age of Instagram flashpacking expectations and aesthetics.
For Him
seven x pairs of underwear | The dark ones are way better to bring as, well, you can get away with wearing them for a cheeky extra day when you can’t get the washing done. Enough for 7 days.
seven x pairs of socks | You can never bring enough socks. Enough for 7 days is solid, including few pairs of trainer socks.
three x pairs of shorts | Two smarter pairs (one denim, one canvas or cotton) for cities, the coast, and general tomfoolery, and a lightweight versatile pair which can be used for hikes as well worn casually.
two x pairs of jeans / trousers | If two pairs of jeans take up too much room or weight, take versatile cotton or linen pair of trousers.
one x pair of lightweight pyjama bottoms | These double up as lazy day trousers in the hostel.
five x cotton vests | Perfect for the beach, wearing under an open shirt, or for hikes.
eight to twelve x t-shirts | The amount depends wholly on space and personal preference, and most people definitely won’t need more than 7 or 8. However, Andrew goes through t-shirts and sweats and always drops food on himself, so takes a few extra. Keep white stuff to a minimum and wear it selectively – the sweat and laundry of a South America trip will soon make it a permanent off-white colour.
one x light long-sleeved cotton shirt or thin jumper | For extra warmth or to cover up if in the jungle with mozzies in the evening.
four x holiday shirts | For the beach, summer, and nights out. Andrew wears a lot of Hawaiian or retro shirts in the summer over t-shirts or vests, so probably packed more than most for the last South America trip.
two x lightweight hiking and cool weather flannel or denim shirts | Perhaps not essential for every bloke, but these are versatile, great for hikes or colder weather climates, and long-lasting.
two x pairs of swim shorts |two are better than one.
Those are the clothes and quantities we each packed for four months in South America (minus hiking gear). We really learned from overpacking mistakes of previous trips, and felt it was a good amount. We had enough items to not always waste time doing laundry, versatile outfits to cover every travel ‘moment’ and destination, and they didn’t take up more than 50% of our backpack space.
If you’re a lighter packer than us or have a smaller backpack, you could cut down on the vests, shirts and t-shirts by a quarter. If you’re travelling for a few weeks or a month, then you can bring less overall too.
South America Travel Tip | Laundry is cheap to do in South America and a really common service wherever you find yourself on the traveller trail. Hostels provide the service, but you’re always cheaper to go out and find a business and spread your money around. A 12-24 hour turnaround is usual, and you’re charged by kilo. It is not unusual for a few items to get mixed up, so check your bag there or back at the hostel rather than leaving it too long. Also, split up your whites and darks rather than expecting them to do it. When going off the beaten track for a number of days, we’ve also hand washed our clothes as facilities are often there. You don’t have to take anything special for this, but we always pack a universal sink plug, a travel washing line, and this small bottle of biodegradable travellers’ soap if we know we’ll be going off-the-beaten-track for days or weeks at a time.
Footwear Essentials
As tempting as it may be to fill half your backpack with shoes for all occasions, you only need to pack three types for South America.
sandals / flip flops | We prefer a pair of Birkenstock Arizonas to flip-flops these days. They’re ideal for bumming around beach towns, but then also smart enough and comfortable enough to wear whilst exploring a city or walking from A to B with your backpack. If you do opt for a pair of Birkies, we’d recommend trying them on first as the sizing doesn’t always align with your actual foot size.
everyday trainers | We tend to have a pair of Converse each on the road as they’re perfect for everything.
hiking boots | If you ain’t got hiking boots in South America, then you’re not doing it right. We used to use lightweight hiking trainers (see here for an idea). They will be fine for you if you are doing moderate hiking in South America during dry season, and also take up less room and weight.
However, we changed last year to diehard fans of the proper hiking boot and haven’t looked back since. They’re heavier, but sturdier, harder wearing, and with much better grip and ankle support. Just remember to wear them on the plane out to South America to keep your backpack weight below the limit, and just store away in your backpack until required on your trip.
Andrew used this pair of Merrell hiking boots in South America, whilst Emily used this excellent value pair by Peter Storm.
wildcard | If you have space at the END of your packing, then you can absolutely feel free to throw in a wildcard set of sexy flats for nights out or making yourself a little more fabulous. Just remember you may hardly ever wear them once you’re on the road!
South America Packing Tip | The public bus network across South America is pretty fantastic (and a large part of the travel experience). Alongside the odd taxi, uber*, or colectivo, it’s going to be your primary mode of transport for your trip. However, depending on you route and time, you may also end up taking one or two flights. Therefore, when packing, keep your main backpack below 20 kg so you don’t face any extra charges or weight restrictions on flights.
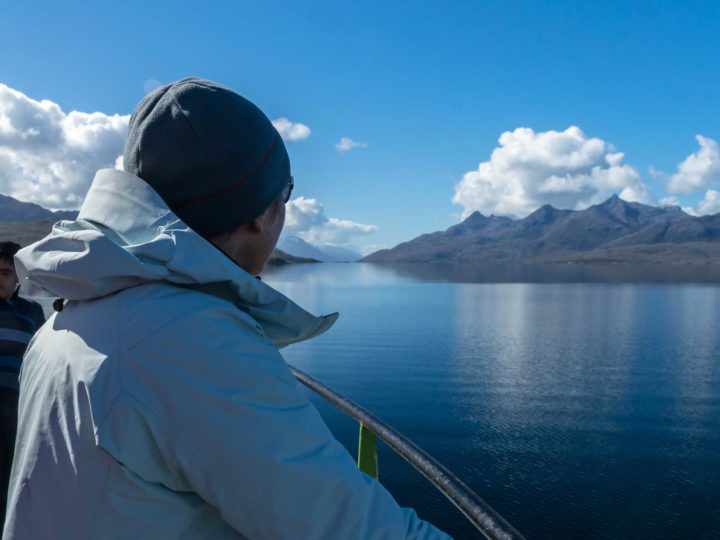
Uber is common in many cities in South America now, and provides a safe and convenient way to get around.
Essential Travel Kit
These are items necessary to keep everything organised, provide you access to safe drinking water, get you out of various jams, and reduce your environmental impact.
Everybody backpacking South America needs them.
travel filter water bottle | It sickens us that we used so many plastic bottles when travelling prior to 2017. However, we really didn’t know any other way to reliably and practically access safe drinking water in various destinations.
That’s why our travel filter water bottles were an absolute game-changer for us.
With them we could access clean, safe drinking water instantly anywhere in South America – and that is not an exaggeration. It looks like a normal water bottle, but the technology of the internal filter removes 99.9% of bacteria, bacteria, viruses, chlorine, fluoride and heavy metals. And so we filled up from taps, rivers, streams, waterfalls and lakes all over South America and never once suffered an issue. Seriously, every single traveller in 2020 needs a filter water bottle.
If you don’t care about the environmental win, then you may also like to know that a filter bottle removes a daily spend of £1-2 on plastic bottles of water whilst travelling South America – budget backpackers rejoice!
We used these 75cl Water-to-Go bottles in South America, and it’s still the best value travel filter bottle on the market. The design and functionality used to have a few issues, but these were fortunately fixed by a new lid design! You can read more in our product review here.
As an alternative, we have heard great things about The Grayl Ultralight; it’s bulkier and more expensive but allows you to hold more water, fill and filter instantly, plus glug like a m*therfucker.
If you’d like to know more about how these bottles work and their benefits for travellers, then read this post: The Best Travel Filter Water Bottles.
refillable water bottle | When the drinking water is safe, or there’s a large dispenser in your hostel, it’s better to use your own refillable water bottle. This is great to glug from, easier to carry around, and also keeps your filter active for longer on the other bottle. It also means you can fill up after airport security rather than waste money and plastic buying water for the plane.
Emily prefers her BPA free plastic bottle because it holds so much, but Andrew swears by his metal one which keeps cold water cold for up to 24 hours.
packing cubes | We never used to use them, now we’re complete converts. We stick all our hiking kit in one, underwear and socks in another, keep our ‘smarter’ things clean and compartmentalised in another, and then put our first aid kit and meds together in another.
These excellent value PRO Packing Cubes have been with us for the last four years.
cloth bag | Instead of taking a plastic bag at the market or supermarket, always have a cloth / canvas carry bag in your daypack or when you pop out. You can read more tip in this article on how to use less plastic when you travel.
swiss army knife | Wizards have their wands, travellers have this. For female and male travellers alike, a Swiss Army knife is just the gold-standard piece of travel kit to carry. When travelling long-term in Latin America, we used it on a near daily basis for all manner of things and wouldn’t go anywhere with out it (just remember to never leave it in your carry-on luggage!)
The Victor Equinox Huntsman has been with us for five years.
travel insurance | You should not travel to South America without it.
We use and recommend True Traveller, whilst World Nomads is another respected global provider. Whoever you insure with, just make sure you do it! If you’re confused about travel insurance, read this post.
emergency teabags | We’re British, deal with it. It was sad day in Quito when we ran out.
ear plugs | If you are spending any time sleeping in hostel dorm, a hammock, or on an overnight bus, you WILL need these. It’s best to spend a little more on reusable silicone ones which last so much longer.
passport photos | You may not need them, but having 4 spare ones with you is always useful. Also, remember your passport.
metal straws | They like to give out plastic straws a LOT in South America. We now say no and use our own metal straws.
toilet paper | You don’t need to bring it from home, but we thought we’d let you know now that it’s really useful to always have some tissues or toilet paper in your daypack. It isn’t uncommon for toilets to have none available, or charge you for a couple of sheets.
head torch | Keep it in your daypack, and use it on multiday hikes in the jungle, when the hostel power fails, or reading in your dorm. We’ve both used this Petzl headtorch for the last five years, and it’s been great.
sunglasses | Go for a stylish or a sporty pair depending on preference.
Lots of people message us to ask two very specific questions about their South America packing:
Do you need to bring a travel mosquito net?
All we can say is that, in two years of carrying our own in Latin America, we used it for one night only; we didn’t bring one for our next trip. Where mosquitoes are an issue, most hostels will have mosquito nets on the beds (although these are in varying degrees of repair). If you don’t bring a net, just cover up and /or use your mosquito spray – we highly recommend incognito bugspray.
Do you need to bring a sleeping bag?
This really depends on, well, whether you know you’re going on hikes or experiences where you have to camp! On our first trip together, we simply rented sleeping bags (of varying quality) directly from the tour company or from outdoor kit companies (there’s always a few of these in South American towns and cities where hiking is a big thing. On our last trip though, as we knew we’d require good sleeping bags for the Inca Trail, we took our small, lightweight sleeping Rab Neutrino bags with us! If you’re really struggling with space or only need a sleeping bag for 2 nights out of 4 months on the road, then it’s best just to rent one in South America.
However, lots of people DO pack a sleeping bag liner with them and swear by it! This makes sleeping in a rented sleeping bag more pleasant, but also gives a hygenic and comfortable separation barrier between you and the bed linen in a hostel where the cleanliness standards ain’t high. For complete transparency, we didn’t pack these for our last trip either.
South America Travel Tip | When you take a night bus in Colombia, you have to bring some warm, extra layers on with you as the bus drivers ALWAYS put the air-conditioning on so that it’s absolutely freezing.
Hiking Kit
As mentioned, hiking in South America is a huge and meaningful part of the travel experience for us. Indeed, someone once told us that the biggest difference between travellers in south-east Asia and South America was that the latter all had hiking boots strapped to their backpacks!
If your trip is bringing you to Peru, Chile, Ecuador or Bolivia, but you have zero plans to hike, then we’d encourage you to maybe have a rethink of your itinerary. So many of the best experiences and sights in those countries are found on a dusty trail or up a mountain, and you’ll be missing out if you don’t stop at any of them.
However, if you already know all the single or multiday hikes that you plan on doing in South America (like the Inca Trail, the Lost City Trek, the Quilotoa Loop, Torres del Paine, Rainbow Mountain, or a few days exploration in the Amazon), then you need to pack several items in addition to the ‘clothes essentials’ and hiking boots listed above.
This is what we packed and recommend.
hiking trousers | Andrew wore this lightweight pair of hiking trousers – did the job absolutely fine.
hiking leggings | These are becoming a really popular choice amongst female hikers, and Emily was very happy with the trail leggings she used in South America.
shorts | We both hiked in our shorts a lot, so remember that one pair of the shorts you bring as part of your ‘clothes essentials’ should also be suitable for hiking. We also packed a pair of running shorts for hikes as they take up zero room or weight.
running vests | We both packed two high-wicking running vests for hikes – essential for the Lost City Trek.
hiking socks | Four pairs of good quality hiking socks, which will double up as your night socks when it’s cold. We used these hiking socks by Brasher.
beanie hat | On high altitude hikes, you’ll appreciate it.
blister plasters | Remember, put these on before the blister fully develops! The best way to avoid blisters is however wearing in your hiking boots and wearing good hiking socks.
hiking poles | We never ever, ever thought we would use hiking poles, let alone bring them on our last trip to South America. However, as we had so many multiday hikes, we thought it wasn’t a bad idea (no matter what the cool kids say!). The vast majority of travellers to South America won’t need to bring their own poles and can rent them for specific hikes. However, if you plan on doing lots of independent hikes with kilos on your back, or have knee issues, we highly recommend the lightweight packable hiking poles we bought.
You can find more specific hiking advice and tips in our Peru Hiking Tips post.
Safety + Money
Lots of people will warn you off South America due to their own fears about safety. Often, those people have never visited it.
We would hate for anyone to not visit such a wonderful and welcoming part of the world due to safety fears, and we’re here to reassure you that South America is generally very safe for travellers. The continent of course has issues (for example, we would not go to Venezuela right now, more out of respect for the the population who have been facing such a horrendous situation for the last five years rather than fear), and travellers should always understand these, respect them, and take a common sense approach. Doing this, and not being an entitled dick with zero awareness of your surroundings, is the biggest thing you can do on the road to minimise risk (read this article for more tips on how to travel safe in South America).
This is what you need to pack in order to minimise risk and keep your money safe.
digit padlock | If you stay in a hostel dorm, you will usually have access to private locker; you have to supply and use your own padlock on this. On all our South America trips together, we have used this sturdy 10-digit padlock. It’s perfect, and also means we don’t have to worry about losing a key. We never stay in a hostel dorm which doesn’t have a private locker for us to store valuables, and we would not recommend anyone else doing it.
bank cards | The safest and most economical way to access your money in South America is to carry a bank card which provides free foreign ATM withdrawals and spending overseas – there are a few of these on the market. This post – ‘How To Manage Your Travel Money Better’ – has a lot more details and advice about how to avoid bad exchange rates, how many cards to take, how to not pay ATM fees, and tips on carrying your money when travelling.
emergency cash | In South America, we always take crisp US dollars in various denominations as our emergency money supply. We’d recommend $150 – 250 per person.
anti-theft kit| We don’t use a moneybelt. Instead, we prefer to hide money across a few places in our daypacks, divide it between us strategically, store a bit of emergency cash in our backpacks, and only take out what we need on the street in our pockets. If we have a lot on us after visiting the ATM, then it’s all about going straight back to hide it in our private room or dorm locker.
However, we know a lot of travellers swear by wearing moneybelts (this is a decent one) under their clothing when out and about.
documents |You should have your insurance details, vaccination record, passport photocopies, and emergency contract details in hard copy somewhere in your daypack. These should also be stored digitally, and ideally shared with a parent or friend before you travel. You should also keep your Yellow Fever certificate safe with these; not all countries require this in South America but it’s best to have the vaccination.
travel insurance | Like we said, do not travel in South America without it – read this post before buying.
South America Packing Tip | When should you start packing? Well, firstly you need to write a list and prioritise buying everything that you really really need first – make sure that’s done and dusted a week before you leave. To save on time and stress, the latest you should have everything laid out on the floor in front of you is 3 days before you fly. This lets you see if it all fits, if you’ve forgotten everything, try to pack and repack, and then make the inevitable purge of shoes and clothes. At the very least, aim to have 90% of everything packed and ready two days before you fly – under no circumstances should you start packing the night before you fly, because it just ain’t fun (we say this as people who know the folly of staying up until 2 a.m. in a packing panic, then having to catch a bus to the airport at 6 a.m.). And always check things off your own list as you go along!
Toiletries
Most of your essential toiletry items can be purchased all over South America. If you are concerned about your backpack weight on your flight out, then just buying them out there is one surefire way to cut down on a kilo.
However, the choice is really quite limited for certain items (especially sustainable and cruelty free toiletries) and things like suncream, moisturiser, and bugspray are often more expensive than back home.
So, if you have specific brands you like, ethical preferences or travel with less plastic, we’d recommend you bring them over in your backpack.
These are the toiletries we recommend as a minimum for South America.
EVERYONE
toothbrush | If you need to buy a new one, please consider getting a pack of bamboo toothbrushes (we use these).
bugspray | We swear by this DEET-free insect repellent by incognito. It’s 100% natural, not tested on animals, and actually smells quite nice too! Importantly, we can confirm from personal experience that it also works against mosquitoes in South America! One bottle should be sufficient for a solo traveller heading over for 1-2 months (available on Amazon).
By the way, when you use spray your bugspray (whatever type),apply it directly to your hand or skin, rather than spraying indiscriminately in the air and close to flora. Plants need insects to be attracted to them and bugspray floating around stops that!
shampoo bar |The weight and space taken up by toiletries can creep up on you. For our last trip, we switched to cruelty-free shampoo bars by Lush. Small, lightweight, and plastic-free, they’re good for about 75-95 washes in our experience.
conditioner bar | As above. Emily found the shampoo bar to be a lot better than the conditioner bar.
tins | If doing for a shampoo or conditioner bar to save space or weight, remember to buy the small tin in which to store them.
toothpaste tablets | We’re split on the toothpaste tablets we took to South America. Although fantastic in several ways – plastic-free, don’t require water, save a lot of space, and great on hikes – our teeth teeth never felt as clean or fresh as we’d like. You can find out more about toothpaste tablets, or plump for your regular product.
soap |A bar of soap takes up less room, weighs less, and lasts longer than a bottle of shower gel. Store in a tin or baggy.
travel towel | Do not leave with out one, they’re absolutely essential. We use these LifeVenture XL travel towels which are quick-drying (in both ways) and lightweight in the backpack.
suncream | Factor 30 or 50 as a minimum. We have struggled to find a good suncream which does the job, doesn’t stain, is reef-friendly, and cruelty free. In the UK, Boots, Superdrug, and supermarket own brand suncreams are definitely cruelty-free, but in our experience often stain and aren’t always reef-friendly – UltraSun has previously been recommended by readers as a good option.
Emily also uses a 50 SPF face-specific suncream every day on the road.
moisturiser | For face and body. It can take up a bit of space though, so feel free to purchase out there.
roll-on deodrant | We have definitely met many many travellers who seem to think that not using any sort of deodrant is part of the travel experience. Unfortunately we haven’t found a good brand yet which doesn’t involve plastic in the packaging – if you do, please let us know.
facewash | Get rid or the sweat and grime.
multivitamins | As we’re vegetarian and our diet sometimes goes a little all over the place on the road, multivitamins help keep us topped up. Nobody wants to get sick on the road.
razors | We shared the blades from a non-disposable metal razor from Cornerstone.
travel tissues | Keep in your daypack as emergency toilet paper.
condoms | Naughty.
after-bite stick | For those moments when you don’t have the bugspray or that renegade mozzie slips through hole in the hostel mosquito net and you don’t want to scrape all your skin off scratching at bites.
paracetamol | For sore heads and hostel hangovers.
hand-sanitiser | Keep a travel bottle of it in your daypack.
antiseptic cream | For any minor cuts, grazes, or scrapes.
plasters | See above.
duct tape | A small roll of this is fantastic for odd jobs on the road – it tapes up any backpack tears or splits, went around Emily’s hiking boots on the Lost City Trek, and fixed up some tech.
non-plastic cotton buds | Make sure they’re paper or wooden.
personal medication | If you have specific allergies or conditions, ensure you pack enough for your trip.
malaria medication | Your requirement for malaria medication depends on the risk and exposure factors on your route – we advise that you visit your travel clinic before you travel to confirm current requirements. However, please do not be one of those idiot travellers who thinks that malaria in South America is not a risk. For more info, read Malaria, The Myths, and the Medicine.
We stored and carried everything in two clear vinyl toiletry bags. Although plastic and cheap as chips, there are a few reasons we went for these:
The material is much easier to clean and dry if something leaks than a traditional fabric travel washbag.
The size (24cm x 5cm x 20cm) held everything we really needed, and stopped us from trying to overstuff.
Being able to see toiletries is much easier when you’re in a hostel or in a hurry, rather than having to rummage or tip out.
If you’re a couple, you can also buy this 6-set of the washbags here. It includes the two medium-sized toiletry bags, three smaller bags that Emily uses for jewellery and make-up, and one massive clear bag which we use to store all our tech cables, chargers, hard drives, and SD cards.
FOR HER
menstrual cup | Honestly, from the point of view of reducing plastic consumption (did you know that one sanitary towel has as much plastic in it as TWO plastic bags?), every woman should invest in one of these. But it’s when you travel that a menstrual cup really comes into their own. Tampons can be sometimes be difficult to source in South America, they’re relatively expensive, and take up much needed space in your backpack. Emily uses and recommends the Lilycup Compact by intimina. You can also purchase via their store on Amazon.
emergency sanitary supplies | That said, it’s always good to have a couple of tampons spare for times when it might be difficult to change the cup, such as on hikes where toilets are the back of a bush, or long bus journeys where the toilets are kind of gross.
contraception | Alongside menstruation, this is an area which female travellers need to discuss more openly as there are various options and restrictions – you can read more of Emily’s advice in this article about women’s health on the road.
hairbrush | Invest in a smaller, travel size brush to save space
make-up | Emily takes very limited makeup with her on backpacking trips, but it’s always nice to have a mascara, concealer and a bit of blusher for nights out or when you fancy looking a little more, well, fancy. All her ‘The Ordinary’ serums, face and eye creams, plus the makeup get stored in the smallest of the clear toiletry bag set that we have.
micellar water | A great product to remove make-up on the road, whilst being sensitive to your skin. We use this one.
bamboo cotton pads | Standard cotton pads are not a sustainable product, and Emily bought these reusable bamboo cotton pads for face-washing and make-up removal in South America – they worked an absolute treat! Highly recommended.
sustainable baby wipes | We discovered after our overland trip in Africa that babywipes use a shit-ton of plastic within them, and therefore take a really long time to degrade if left outdoors. Therefore, a biodegradable babywipe is the responsible choice.
perfume | Again, not an essential, especially if you only have heavy glass bottles, but Emily loves travelling with a small metal bottle of her favourite perfume.
FOR HIM
shaving gel + post-shave moisturiser | Sensitive skinned lad he is.
hair wax | For hair, obvs.
aftershave | Covers up the stink.
South America Packing Tip | If you have space in your bag, please take a look at Pack for Purpose. All they ask is for travellers to give up a small amount of space in your luggage to pack supplies needed by community projects around the world (including dozens in South America).
Technology
What we are sharing below is what we took on our South America last trip – it is by no means what you should be taking on your own trip to South America! Therefore, we’ve split it into two sections.
Essential Tech
smartphone | Like it or loathe it, having a smart phone and an internet connection is now a big part of how we all travel. Take yours to South America for maps, apps, podcasts, audiobooks, and emergencies – just try not to spend too long on it on your travels.
phone charger | For charging the phone, obviously.
universal plug adapter | You need at least one plug converter, but two is better if you have a lot of tech. If you travel a lot, a universal adapter is an essential and space-saving piece of kit – find one here.
powerbank | For multiday hikes or long bus journeys when you need to keep your phone alive. We use this one by RavPower, but most solo travellers would be better with this small, light, and portable one by Anker.
bluetooth headphones | Andrew could not travel without these. They help to pass the many hours spent on buses in South America, and also form a soundshield between you and any dorm room buddies you don’t feel like chatting to. If you don’t want to spend too much on a pair, the Jabra Move are a fantastic choice – Emily has pair and highly recommends.
a tablet | Unless you’re a blogger or need it for work, we don’t recommend taking a laptop with you to South America; for most travellers, a phone will be all you’ll need. However, a tablet is absolutely perfect for watching Netflix downloads on bus journeys or in hostels, booking and researching the next stage of your trip, or doubling up as your personal library for ebooks. If you pair it with a stand keyboard cover, then it also becomes a really lightweight travel computer!
We have the iPad 9.7” and pair it with this cheap keyboard case, which has really exceeded expectations.
Additional TECH
laptops | As we mentioned, the tablet + keyboard combination is going to be better for most travellers than a laptop. However, if you do bring a travel laptop, we use and recommend the lightweight and slimline 13-inch Macbook Pro.
cameras |You can check out what’s in our camera bag in this post.
sd cards | The cheapest and best place to buy SanDisk SD cards (the only brand we use) is on the company’s official Amazon store – never ever buy them at the airport or other stores as the price mark-up is huge. The Extreme and Extreme PRO models are best.
sd card holder | When you have a lot of SD cards to carry, you need a good SD card holder. We use this one, and it’s great.
hard-drives | For backing up our photos on the road, we use these 1TB Military-tested hard-drives.
plug extension | A bit of an odd one, but as hostels so infrequently have multiple plugs, we struggle to charge everything we need at once or overnight. And so, carrying a 4-plug extension cable from the UK solved that problem pretty easily!
storage | All cables, chargers, filters, hard-drives, SD card holders etc, were stored in the largest bag from this set of transparent bags – the other ones were used as our toiletries and make-up bags!
insurance | Travel insurance policies don’t cover high-value photography equipment as standard, and it’s more economical to purchase a standalone specialist photography insurance policy.
Source https://worldlyadventurer.com/south-america-packing-list/
Source https://www.alongdustyroads.com/posts/south-america-packing-list
Source