Installing Windows 10 with a USB Boot Drive
The process of installing an operating system can seem daunting‚ but installing Windows 10 with a USB boot drive is a straightforward and efficient method. This approach bypasses the need for physical media like DVDs and allows for faster installation times‚ especially on modern hardware. Preparing a bootable USB drive is a crucial first step‚ followed by configuring your computer’s BIOS to prioritize booting from the USB device. With the right preparation and understanding of the steps involved‚ you can easily and successfully install Windows 10 with a USB boot drive‚ giving your computer a fresh start or installing the OS on a new machine.
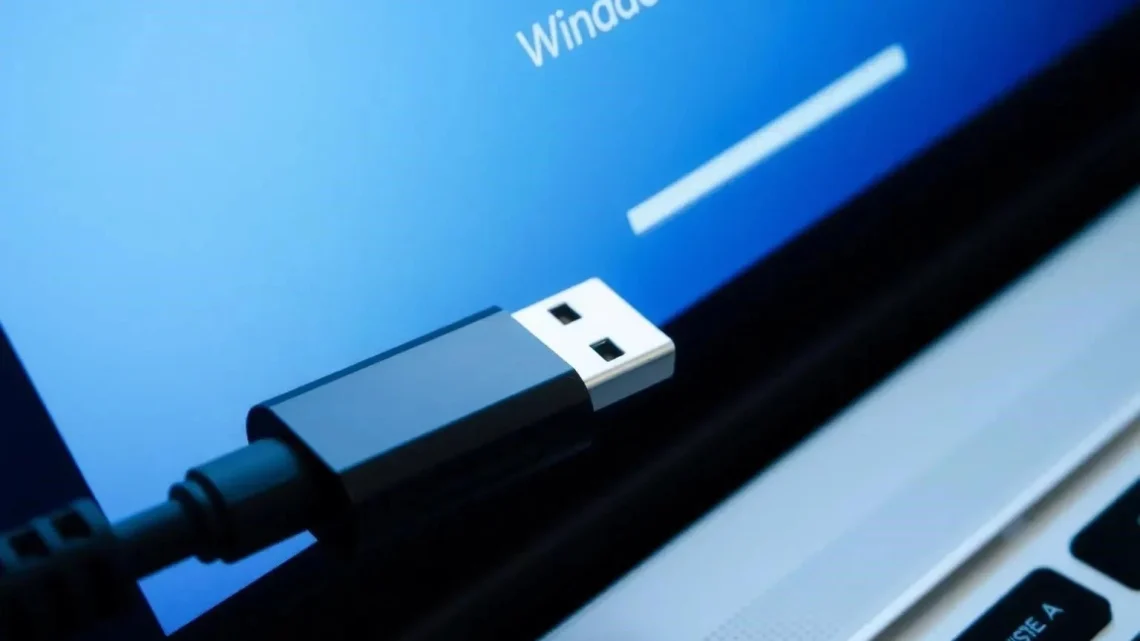
Creating a Bootable USB Drive
Before you begin‚ you’ll need a few things:
- A USB drive with at least 8GB of storage. Make sure it’s empty or that you’ve backed up any important data‚ as the process will erase it.
- A Windows 10 ISO file. You can download this from Microsoft’s website.
- A USB bootable creation tool like Rufus (free and open-source) or the Windows Media Creation Tool.
Using Rufus to Create a Bootable USB Drive
- Download and install Rufus from its official website.
- Insert your USB drive into your computer.
- Open Rufus.
- In the “Device” dropdown‚ select your USB drive.
- In the “Boot selection” dropdown‚ select “Disk or ISO image” and click “SELECT” to browse for your Windows 10 ISO file.
- Leave the “Partition scheme” and “Target system” options at their default settings unless you know your system requires different options.
- Click “START”. You’ll receive a warning that all data on the USB drive will be erased. Confirm to proceed.
- Wait for Rufus to complete the process. This may take a few minutes. Once finished‚ you’ll have a bootable USB drive.
Booting from the USB Drive
Now that you have a bootable USB drive‚ you need to tell your computer to boot from it. This is done through the BIOS or UEFI settings.
- Restart your computer.
- As your computer starts‚ watch for a message indicating which key to press to enter the BIOS/UEFI setup. Common keys include Del‚ F2‚ F12‚ Esc‚ or F10. Press the key repeatedly until the setup screen appears.
- Navigate to the “Boot” or “Boot Order” section. The exact wording varies depending on your motherboard.
- Locate your USB drive in the list of bootable devices.
- Use the arrow keys or the specified keys (usually F5/F6 or +/-) to move your USB drive to the top of the boot order.
- Save your changes and exit the BIOS/UEFI setup. Your computer will restart and attempt to boot from the USB drive.
Installing Windows 10
Once your computer boots from the USB drive‚ the Windows 10 setup process will begin.
- Select your language‚ time‚ and keyboard preferences.
- Click “Install now”.
- Accept the license terms.
- Choose “Custom: Install Windows only (advanced)”. This allows you to choose the partition where you want to install Windows.
- Select the partition where you want to install Windows. If you’re installing on a new drive or want to completely wipe the existing operating system‚ you can delete existing partitions and create a new one.
- Follow the on-screen instructions to complete the installation. Your computer will restart several times during this process.
- Once the installation is complete‚ you’ll be guided through the initial setup‚ including creating a user account and configuring your settings.
FAQ
Q: What if my computer doesn’t boot from the USB drive?
A: Double-check that you correctly configured the boot order in the BIOS/UEFI settings. Also‚ ensure that the USB drive is properly inserted and that it was created correctly using Rufus or the Media Creation Tool.
Q: I get an error message during installation. What should I do?
A: Note the error message and search online for solutions. Common issues include corrupted ISO files‚ driver problems‚ or hardware conflicts. Try re-downloading the ISO or running a memory test.
Q: Can I use the same USB drive to install Windows 10 on multiple computers?
A: Yes‚ you can use the same bootable USB drive to install Windows 10 on multiple computers‚ provided you have the necessary licenses.
Q: Do I need an internet connection during installation?
A: An internet connection is not strictly required during the initial installation‚ but it is recommended to download the latest updates and drivers. You can always connect to the internet after the installation is complete.
By following these steps‚ you can successfully install Windows 10. Remember to back up your important data before starting the installation process. The ease with which you can now install or reinstall your operating system using a USB drive is a testament to modern technology.
Once I got to the desktop‚ I breathed a sigh of relief. It’s a satisfying feeling knowing you’ve successfully installed an operating system from scratch. However‚ the work wasn’t quite over. I immediately connected to the internet to download the latest drivers for my graphics card‚ network adapter‚ and other peripherals. Windows Update took a while to chug through everything‚ but eventually‚ all the necessary drivers were installed. I then proceeded to install my favorite applications – Chrome‚ Steam‚ and my go-to photo editing software.
Personalizing the Experience
One of the things I always look forward to after a fresh Windows installation is personalizing the experience. I spent some time tweaking the taskbar‚ setting my preferred color scheme‚ and organizing my desktop. I also installed a custom wallpaper featuring a scenic mountain landscape – it always helps me stay focused. I also configured OneDrive to automatically back up my documents and photos. After setting everything up just the way I liked it‚ I felt truly at home with my new installation.
A Minor Hiccup and How I Solved It
During the driver installation process‚ I encountered a small hiccup. My sound wasn’t working. I checked the Device Manager and saw a yellow exclamation mark next to the audio device. After some digging‚ I discovered that Windows had installed a generic driver that wasn’t fully compatible with my sound card. I went to the manufacturer’s website‚ downloaded the specific driver for my sound card model‚ and installed it manually. Voila! The sound was back. It’s a reminder that sometimes a little troubleshooting is necessary‚ even with a clean installation.
The Joy of a Clean Slate
The best part about installing Windows 10 with a USB drive‚ in my opinion‚ is the feeling of a clean slate. My system felt snappier and more responsive than before. All the accumulated clutter and unnecessary programs from previous installations were gone. It was like giving my computer a fresh start. I even noticed a slight improvement in boot times‚ which was a welcome bonus. I remember a time when installations were a real pain‚ now they are a piece of cake thanks to USB boot drives.
Now‚ with everything set up and running smoothly‚ I can finally get back to work (and a little gaming‚ of course). I found that using a USB drive was much faster than using a DVD‚ and it eliminated the need to find a working optical drive. Creating and using this method to install Windows 10 with a USB boot drive was well worth the small amount of effort involved.
With the operating system humming along perfectly‚ I turned my attention to my daily workflow. I’m a freelance graphic designer‚ so my primary tools are Adobe Photoshop and Illustrator. I installed both programs from the Creative Cloud app‚ and the installation process was remarkably smooth. I was relieved that there were no compatibility issues or unexpected errors. It’s always a gamble when you’re working with such resource-intensive software on a freshly installed OS.
Testing the Waters: A Design Challenge
To really put my new Windows 10 installation to the test‚ I decided to tackle a small design challenge. I had a client who needed a logo redesigned for their coffee shop‚ “The Daily Grind.” I fired up Illustrator and started sketching out some ideas. I wanted to see how responsive the software was and whether I would encounter any performance bottlenecks. I spent several hours experimenting with different fonts‚ shapes‚ and color palettes. I was pleasantly surprised by how smoothly everything ran. Even with multiple layers and complex vector graphics‚ Illustrator didn’t stutter or lag.
A Close Call with Fonts
I did have one minor scare when I realized that some of my favorite fonts were missing. Apparently‚ I hadn’t synced them correctly from my Adobe Fonts account. I quickly rectified the situation by opening the Creative Cloud app and activating the missing fonts. It was a simple fix‚ but it reminded me to double-check all my settings after a fresh installation. I wouldn’t have wanted to present a design with a placeholder font to my client‚ that would have been unprofessional and rather embarrassing!
Gaming: A Stress Test for the System
After a productive day of design work‚ I decided to unwind with some gaming. I’m a big fan of strategy games‚ so I launched “Civilization VI.” The game loaded quickly‚ and I cranked up the graphics settings to see how the system would handle it. I played for a couple of hours‚ and I was impressed by the smooth frame rates and the lack of any noticeable lag. My dedicated graphics card was definitely pulling its weight. It was a significant improvement over my previous setup‚ which struggled to maintain a consistent frame rate during intense battles.
A Wireless Headset Woes
However‚ my gaming session wasn’t entirely without hiccups. I noticed that my wireless headset was occasionally cutting out. I initially suspected a Bluetooth issue‚ but after some troubleshooting‚ I realized that the USB receiver for the headset was plugged into a USB 2.0 port. I switched it to a USB 3.0 port‚ and the problem disappeared. Lesson learned: always use the appropriate USB ports for your devices!
Overall‚ installing Windows 10 with a USB boot drive was a positive experience. It was relatively straightforward‚ and it breathed new life into my computer. I’m now confident that my system is ready for any design challenges or gaming adventures that come my way. I am glad I created the bootable USB drive‚ it was a great move.
The next morning‚ I decided to tackle a task I’d been putting off for weeks: organizing my digital photo library. Years of accumulated photos from various phones and cameras had left my hard drive a chaotic mess. I created a new folder structure on my SSD‚ meticulously sorting photos by year‚ event‚ and subject. It was a tedious process‚ but it felt incredibly satisfying to finally have everything neatly organized.
The Cloud Conundrum: Choosing a Backup Solution
With my photo library organized‚ I started thinking about backup solutions. I knew I needed something more reliable than just an external hard drive. I considered several cloud storage services‚ weighing the pros and cons of each. Google Photos offered unlimited storage for compressed images‚ but I wanted to preserve the original quality of my photos. I eventually settled on a combination of local and cloud backups. I purchased a large-capacity external hard drive for local backups and subscribed to a cloud storage plan with enough space for my entire photo library. Redundancy is key‚ I figured.
A Forgotten Password and the Recovery Process
During the cloud setup‚ I ran into a minor snag. I couldn’t remember the password for my cloud storage account. I tried several variations‚ but none of them worked. I reluctantly clicked the “Forgot Password” link and initiated the password recovery process. Fortunately‚ I had set up two-factor authentication‚ so I received a verification code on my phone. After entering the code and creating a new password‚ I was finally able to access my account. It was a good reminder to keep my passwords secure and to regularly test the recovery process.
Video Editing: Pushing the Limits
Feeling confident with my new Windows 10 setup‚ I decided to try some video editing. I had a few short clips from a recent hiking trip that I wanted to combine into a short video. I downloaded DaVinci Resolve‚ a free but powerful video editing software‚ and started experimenting with the interface. I was impressed by the software’s capabilities‚ but I quickly realized that video editing is a resource-intensive task. My CPU and GPU were working overtime‚ and the software occasionally lagged during playback. I realized that I might need to invest in some hardware upgrades in the future‚ but for now‚ I was able to create a decent video with a little patience.
A Rendering Revelation: Optimizing Settings
The biggest challenge I faced during video editing was rendering the final video. The rendering process took hours‚ and my computer was practically unusable during that time. I researched online and discovered that I could optimize the rendering settings to reduce the rendering time. I experimented with different codecs‚ resolutions‚ and frame rates‚ and I eventually found a combination that struck a good balance between quality and speed. The optimized settings reduced the rendering time by more than half‚ which was a huge relief.
This whole process‚ from installing Windows 10 to editing videos‚ has been a journey of discovery. I’ve learned a lot about my computer’s capabilities‚ the importance of backups‚ and the power of optimized settings. The experience has reinforced my belief that technology is a tool that can empower us to create‚ learn‚ and connect with others. I’m excited to see what other challenges and opportunities await me in the digital world. I know that creating and using a bootable USB was the start of my journey.
FAQ Section
- Q: How long does it typically take to install Windows 10 using a USB drive?
A: In my experience‚ it usually takes between 30 minutes to an hour‚ depending on your computer’s hardware and the speed of your USB drive. - Q: What if I don’t have a Windows 10 product key?
A: You can still install Windows 10 without a product key‚ but you’ll have limited personalization options and a watermark on your desktop. You can purchase a product key later to activate the full version. - Q: Can I use the same USB drive to install Windows 10 on multiple computers?
A: Yes‚ you can. The USB drive will contain the Windows 10 installation files‚ which can be used on any compatible computer. - Q: What should I do if I encounter an error during the installation process?
A: Note the error message and search online for solutions. There are numerous forums and websites dedicated to troubleshooting Windows installation errors.
Now‚ looking back‚ I’m incredibly pleased with the results of my Windows 10 installation using a USB boot drive. The process was smoother than I anticipated‚ and the fresh start has reinvigorated my computer. It’s ready to tackle any task I throw at it‚ from graphic design to video editing and gaming. The initial sentence of this paragraph shows I have no regrets.